Showing posts with label cookies. Show all posts

Sunday, December 7, 2014

Raspberry Almond Thumbprint Cookies

For my favorite cousin, Cindy!

I don't know about you but I am heavy into holiday baking season.  Yes, it's only the 7th of December but my sheet pans have gotten a serious workout these last few weeks.  I've also started a new extreme sport: baking w/ a toddler.  Apparently, I have serious thrill seeking issues.

Baking w/ an almost three year old (how did that even happen?!) is like baking w/ say, the Tasmanian Devil.  Did anyone else have those really obnoxious t-shirts growing up?

......

Moving along.  These cookies take a bit of preparation and some delayed gratification is involved, which, let's face it - is not necessarily a toddler's strong suit.  Either way, the payoff for these amazing cookies is totally worth it.  Give yourself a few hours (at least) before you need these, they require some time to chill out in the fridge before baking.

We're headed down to Florida in February and I cannot wait to get in the kitchen with these girls and bake some more of these awesome cookies.

No, I don't actually have a picture of the cookies.
That would make entirely too much sense and take entirely too much foresight.

What are you baking for the holidays?

Raspberry Almond Thumbprint Cookies

Adapted from this recipe (I don't think they need the glaze and I like my technique better so you're not killing yourself working w/ hard, cold dough which is more difficult to form)

makes about 30 cookies

1 c. unsalted butter, softened (2 sticks)
1/2 c. granulated sugar
1 tsp. vanilla extract (or vanilla bean paste)
1/2 tsp. almond extract
1/2 tsp. salt
2 c. plus 2 tbsp. AP flour (sifted)
1/2 c. raspberry jam

Begin by creaming the butter and sugar until light a fluffy.  Add in extracts and salt, blend until combined.  Add in flour in 1/2 cup additions until combined but be careful not to over-mix or else you end up with tough dough.

Using a 1 oz. cookie scoop (or a rounded tablespoon), scoop out portions of dough and roll in to balls, place on a cookie sheet lined with a silicone baking mat or parchment paper.  Press thumb lightly to flatten the balls and create an indentation in the dough for the jam later.  There will be cracking which doesn't bother me but if you'd rather have perfectly uniform cookies, the dough can easily be smoothed back.  I like the wrinkles/cracks - gives them character :) This is the best part about having kids help - it's hilarious and adorable to see little tiny thumb prints (sometimes 2 or 3) in these cookies.

Chill in the fridge for at least 2 hours and up to overnight.

When the dough is completely chilled and you're ready to bake, preheat oven to 350 degrees.  Take the dough out and make sure each cookie has about 2" of clearance from other cookies, either baking in a few batches or on separate baking sheets.  These will spread slightly but less so after chilling.  A silicone mat (as opposed to parchment paper) will also help keep these from spreading too much.

You can spoon 1/2 teaspoonfuls into each imprint.  I like using a piping bag or just a plastic sandwich bag to keep them clean.  Put the jam in the bag, snip a small corner off and pipe the jam into each indentation.  Bake for 12-15 minutes - make sure your oven temperature is right, you don't want these to brown.

Keeps in an airtight container in the fridge for a week but I bet anything they won't last that long.

Saturday, August 3, 2013

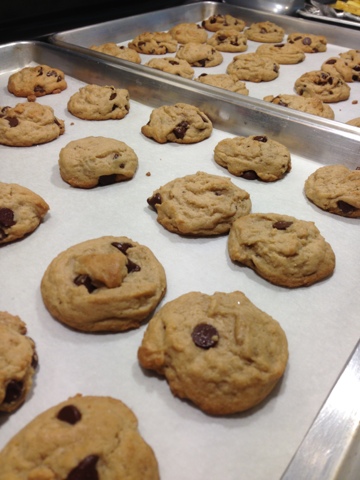
The Last Chocolate Chip Cookie Recipe You'll Ever Need For the Rest of Your Life

I know. I have a flair for the dramatic when it comes to food.  Before I get in to the recipe, let me qualify this by saying I've eating and made a LOT of chocolate chip cookies in my day.  This is by far THE best chocolate chip cookie I've ever made and I use it for everything.  It's got the chewy texture, loads of chocolate chips and that addictive salty edge that makes everything taste just a tiny bit better. 


Seems like the salt-in-desserts kick has definitely taken the food world these last few years by storm (salted caramel ice cream, cake pops, Seattle's own oh-so-famous salted caramel chocolates even the President can't get enough of, etc.). I get the finely ground stuff from my faaaaavorite wholesale store which works really well. I made these cookies for a few years and while amazing, I was always finding I'd eat the cookies top-side down so I could get that salty kick first - but nobody eats cookies like that. So I decided to sprinkle a little salt underneath the cookie dough and on top.

Mind.  Blown.

And now I don't have to get those weird semi-polite looks from people when I tell them they should eat the cookie upside down which invariably had people thinking I was asking them to head stand or find some damn monkey bars so they could hang upside down to eat this cookie. 


Sea Salt Chocolate Chip Cookies

heavily adapted from this recipe

Makes about 5 dozen small cookies

2 sticks butter, unsalted & room temperature

¼ cup granulated sugar

¼ cup turbinado sugar (Sugar in the Raw)

1½ cup brown sugar

2 eggs

1 tbsp vanilla extract

1½ tsp. baking soda

½ tsp. salt

3½ cups all-purpose flour

1½ c. chocolate chips

Sea salt

Preheat the oven to 350ºF.
Cream butter and sugars together until the butter is light and fluffy - pale yellow, scrape down the bowl and mix a few more times.  One ingredient at a time, add eggs, vanilla, baking soda and salt, scrape down bowl and keep mixing.  If you're using a stand mixer, turn the mixer to the lowest speed and add the flour in a cup at a time until just combined.  Don't over mix the dough or you'll get a tough cookie.  After all the flour is incorporated, fold in the chocolate chips.  Sometimes it's helpful to switch to the dough hook so you don't break up all the chips while they're mixing - or just fold in with a spatula by hand and count it as your workout for the day.  Remember though, don't over mix!

Dough is done. 

Sprinkle a tiny pinch of salt where you plan on placing your cookies on the baking sheet.  I do this step all at once, just make a little grid on the baking sheet in a 4 x 5 pattern leaving about 3" between each sprinkling of salt.  Scoop mounds of cookie dough on each pinch of salt.  The recipe makes about 5 dozen cookies if you use the small version of this scoop - leave them mounded, they will spread and flatten during baking. 

Place the dough about 2" apart and you can usually get about 20 cookies per half sheet pan.  Depending on your oven, bake for approximately 11-13 minutes.  Remove from oven and transfer to a cooling rack for at least 20-30 minutes if you can wait that long. 

Tips:

They may seem slightly under done when you take them out and maybe just the slightest bit golden on a few edges but definitely not browned.  This way, when they cool they'll have that yummy chewy texture.

These cookies are also a great do-ahead recipe.  I almost always have these cookies ready to bake from a frozen state so if you're going that route, use a 1½" cookie scoop to dish out on to a parchment sheet lined baking sheet and freeze them.  They pop off the sheet and go in to a ziplock bag and store for weeks in the freezer.  You can just take however many you need and bake off.  I usually set the oven at 360ºF and bake for an extra minute or two from a frozen state.

"Sometimes you feel like a nut."  And when you do, add in a cup of chopped walnuts when you're mixing in the chocolate chips.  I'm married to a no-nut-in-desserts person.  Grrr.

Monday, April 5, 2010

Almond Blueberry Lavender Lemon Biscotti

Back in the day (almost a decade, yikes) I worked as a barista for Starbucks. I can still vividly remember the 4:15a alarm clock trying desperately to keep me on time to punch in at 5a. Carrie, my roommate and later bridesmaid slept through the alarm, luckily. That or she was too polite to let on it woke and annoyed her.

I'd get ready and drive to work (half asleep Asian woman driver, very dangerous), it was only about 7 minutes away, I timed it. Those busy mornings (brace yourself, this is cheesy) were some of the best times of my life. No mortgage, no responsibilities, nothing.

Here's a picture of Tien and me at our store. Geez Tien, go wash your apron. Haha, she hates me.

Biscotti always remind me of that time. We had these big glass jars full of vanilla almond and chocolate hazelnut biscotti. After I found a great biscotti recipe I changed it a little to use ingredients I had in my pantry and the result?

Almond Blueberry Lavender Lemon Biscotti.

They're awesome, the lavender and lemon combo really work well together. Seriously though, someone please find a shorter name for these.

Ready? Let's roll.

Start w/ my favorite ingredient: butter. One stick (i.e., 1/4 lb. or 1/2 c. - I think I finally have it now) at room temperature.

I used my stand mixer but you can use a hand mixer or just do it by hand and skip the gym that day. Cream the mixture w/ 3/4 c. of sugar. The only reason I deviated from the full cup in the original recipe was simply b/c that's all we had left. It's embarrassing to admit you went through the whole 10 lb. bag of sugar you got from Costco.

Forget I just said that. Moving on, lemon zest.
Zest of one lemon. Smells like summer to me. Add to the butter an let it go for a sec.

Scrape down the butter/sugar mixture.
Look at all that sugar on the side of the bowl. It needs to socialize w/ everyone else.
Eggs. Original recipe calls for two eggs. You can probably get by w/ just two eggs in this recipe too. It just wasn't written clearly that the last egg white is only for the egg wash. So I just dumped an extra egg in, what the heck. I get eggs from Costco too.
Add them in one at a time and scrape down again (w/ your personalized spatula - ok, promise that's the last time I bring that up).
Then add your flour. 2 c. of the fluffy white stuff.
1 tsp. of each of these characters. You can use almond extract too. I thought of that too late.
Then you get this pretty wet dough.
2/3 c. raw almonds.
1/2 c. dried blueberries, all purchased at my favorite place to shop, Costco.
Mmmm. Why don't I use these more?

All the kids in the pool.
Then, my true stroke of genius: lavender. Just a tsp. please, it's very strong.
Fold all the aforementioned things into the dough. Here's also where you can get creative - dried currants, apricots, dates, peanuts, pine nuts, whatever. Try your own nut/fruit combo. Go ahead, I dare you.

See what I mean about being a super wet dough? Flour your hands well or else you'll end up w/ mallet hand.
Form into logs. Give these guys a little room to grow too, they expand while they bake.

Brush w/ egg wash.


Sprinkle w/ coarse sugar, I used raw sugar. You can get that other fancy turbinado sugar. Oh, the pretense.

It sure is pretty.

15-20 minutes later, here you are. A strange looking cookie log.

Then while the logs are still warm (I didn't wait to let them cool) slice these guys up. I guess try first w/ a serrated knife, then if that doesn't work, use a chef's knife.

It didn't make sense to me anyways when I read that other recipe, the almonds are going to be hard to cut through. I need to write Anne Burrell.

Ok, lay flat and bake again. I had to bake mine for about 20-25 minutes to see any golden brown action.

But then they were. And the seas parted and Moses said.. Oh, wait. NM.

While these were still warm I poured myself a cup of tea and had a nice little break to sit back and admire the handy work.
Check out that blueberry!
Almond Blueberry Lavender Lemon Biscotti

adapted from this Anne Burrell recipe

makes about 20 biscotti

1 stick butter, room temp (about 1/2 cup or 1/4 lb.)
3/4 c. sugar
3 eggs
2 tsp. lemon zest (about the zest of 1 lemon)
1 tsp. baking powder
1 tsp. vanilla extract (almond would work well too)
2 . AP flour
2/3 c. whole almonds
1/2 c. dried blueberries
1 tsp. dried lavender
1 egg white
2 tbsp. Sugar in the Raw

Preheat oven to 300 degrees. Cream butter and sugar until light & fluffy in a stand mixer. Meanwhile, zest lemon and add to the butter mixture. Scrape down the sides of the bowl and put the mixer on low speed. Crack in one egg at a time until combined - scrape down in between egg additions. Add vanilla extract, flour and baking powder until combined. Fold in almonds, blueberries and lavender - make sure to fold in by hand so almonds and blueberries stay whole and in tact.
Divide the dough in half. The dough will be fairly sticky so flour your hands and form into a log. I used a half sheet baking pan and the log ran about 2 inches shy on each side of reaching the edge of the pan. Separate an egg and mix the white w/ about 1 tbsp. water and brush the tops of each log. Sprinkle w/ coarse sugar.

Bake for 15-20 minutes until set and cooked through, it won't be browned but that's ok. And if you really have a problem w/ it, just bake it for 25 minutes. While warm, remove logs to cutting surface and cut logs on the bias at about 3/4" thickness. I had to cut with a chef's knife (instead of the serrated knife the recipe recommended) since my biscotti were crumbling pretty bad when I got to the almonds. Lay flat (either cut side down) and bake for another 20-25 minutes or until lightly golden.

Remove and place on a cooling rack until completely cooled before storage in an airtight container.