Showing posts with label chocolate. Show all posts

Monday, October 21, 2013

Momma Sally's Brownies

This post is going to be short and sweet - just like Momma Sally, Gabe's wonderful grandmother!  She grew up in the Midwest meaning she's genetically predisposed to having the cooking gene.  She's also a fantastic gardener, brilliant storyteller, devout churchgoer and an all around amazing matriarch to this family.  
Isn't she adorable??


Don't let that sweet exterior fool you though, she's tough as nails and fiercely independent.  Even though we aren't related by blood, I think of her as my own grandmother - the last living grandparent I have.  Thanks for being such a wonderful person and example for the rest of us, Sal.  xoxoxo

These brownies are awesome.  Very simple ingredients and a great brownie comes out of the oven every time.  Excellent basic recipe that I like to throw lots of different things in to and see how badly I can annoy Gabe.


Probably Gabe's biggest annoyance factor - nuts!


Momma Sally's Famous Brownies

makes 1 8x8" or 9x9" pan - could be considered a single serving size if one tries hard enough

2 sq (2 oz) unsweetened baking chocolate (found in the baking aisle)
1 stick butter (1/2 cup)
1 c sugar
2 eggs
1/2 c flour
1 tsp vanilla extract
pinch of salt

Preheat oven at 350 degrees.  Melt chocolate and butter together, either in the microwave (for 30 second intervals, stirring between) or over a double boiler until just melted. Set aside to cool slightly.

First add the sugar to the chocolate mixture, then vanilla, salt, eggs, and finally the flour, stirring only enough to incorporate the flour.  Do not over beat.

Bake at 350, for 25-30 minutes. The edges should be pulling away, and the top of the center of the brownies be a little springy then you gently tap with your finger. You can also test by inserting a knife in the middle.

Notes: 

Of course I couldn't leave well enough alone.  Sometimes I knock down the sugar to about 1/2 c if I know I'll be adding in another sweet ingredient.  I've lessened the flour as well to make a more fudgy brownie.  Play with it and make it your own!

You can also try some different combinations of the below.  Most on this list would annoy Gabe.. 


Saturday, August 3, 2013

The Last Chocolate Chip Cookie Recipe You'll Ever Need For the Rest of Your Life

I know. I have a flair for the dramatic when it comes to food.  Before I get in to the recipe, let me qualify this by saying I've eating and made a LOT of chocolate chip cookies in my day.  This is by far THE best chocolate chip cookie I've ever made and I use it for everything.  It's got the chewy texture, loads of chocolate chips and that addictive salty edge that makes everything taste just a tiny bit better. 


Seems like the salt-in-desserts kick has definitely taken the food world these last few years by storm (salted caramel ice cream, cake pops, Seattle's own oh-so-famous salted caramel chocolates even the President can't get enough of, etc.). I get the finely ground stuff from my faaaaavorite wholesale store which works really well. I made these cookies for a few years and while amazing, I was always finding I'd eat the cookies top-side down so I could get that salty kick first - but nobody eats cookies like that. So I decided to sprinkle a little salt underneath the cookie dough and on top.

Mind.  Blown.

And now I don't have to get those weird semi-polite looks from people when I tell them they should eat the cookie upside down which invariably had people thinking I was asking them to head stand or find some damn monkey bars so they could hang upside down to eat this cookie. 


Sea Salt Chocolate Chip Cookies

heavily adapted from this recipe

Makes about 5 dozen small cookies

2 sticks butter, unsalted & room temperature

¼ cup granulated sugar

¼ cup turbinado sugar (Sugar in the Raw)

1½ cup brown sugar

2 eggs

1 tbsp vanilla extract

1½ tsp. baking soda

½ tsp. salt

3½ cups all-purpose flour

1½ c. chocolate chips

Sea salt

Preheat the oven to 350ºF.
Cream butter and sugars together until the butter is light and fluffy - pale yellow, scrape down the bowl and mix a few more times.  One ingredient at a time, add eggs, vanilla, baking soda and salt, scrape down bowl and keep mixing.  If you're using a stand mixer, turn the mixer to the lowest speed and add the flour in a cup at a time until just combined.  Don't over mix the dough or you'll get a tough cookie.  After all the flour is incorporated, fold in the chocolate chips.  Sometimes it's helpful to switch to the dough hook so you don't break up all the chips while they're mixing - or just fold in with a spatula by hand and count it as your workout for the day.  Remember though, don't over mix!

Dough is done. 

Sprinkle a tiny pinch of salt where you plan on placing your cookies on the baking sheet.  I do this step all at once, just make a little grid on the baking sheet in a 4 x 5 pattern leaving about 3" between each sprinkling of salt.  Scoop mounds of cookie dough on each pinch of salt.  The recipe makes about 5 dozen cookies if you use the small version of this scoop - leave them mounded, they will spread and flatten during baking. 

Place the dough about 2" apart and you can usually get about 20 cookies per half sheet pan.  Depending on your oven, bake for approximately 11-13 minutes.  Remove from oven and transfer to a cooling rack for at least 20-30 minutes if you can wait that long. 

Tips:

They may seem slightly under done when you take them out and maybe just the slightest bit golden on a few edges but definitely not browned.  This way, when they cool they'll have that yummy chewy texture.

These cookies are also a great do-ahead recipe.  I almost always have these cookies ready to bake from a frozen state so if you're going that route, use a 1½" cookie scoop to dish out on to a parchment sheet lined baking sheet and freeze them.  They pop off the sheet and go in to a ziplock bag and store for weeks in the freezer.  You can just take however many you need and bake off.  I usually set the oven at 360ºF and bake for an extra minute or two from a frozen state.

"Sometimes you feel like a nut."  And when you do, add in a cup of chopped walnuts when you're mixing in the chocolate chips.  I'm married to a no-nut-in-desserts person.  Grrr.

Monday, April 12, 2010

Pain au Chocolat

One of my favorite results from starting my blog is seeing exactly how many other people are out there doing the exact same thing. I see all these bloggers that have been doing this for years and years and you can certainly see it reflected in their blogs. Now, I'm not going to get all self-deprecating and harp on how my blog compares, etc. I recognize I'm new at this and it can only get better w/ time, right? (Right, honey? How about that new fancy camera?)

This post is directly from one of my favorite vegetarian blogs - she's local too. I feel like I could run into her somewhere on the street (and no, I probably wouldn't have the nerve to introduce myself). It would be like spotting a reality star while you were out running errands..Snooki at Target buying hairspray or something. Not that I would peg her to have anything in common w/ Snooki. Is that weird? Don't answer that.


Anyways, every time Gabe recalls this trip he took as a child to France (here he is celebrating his 3rd bday one his first trip there - is he picking his nose?), he's forever telling me about how much he loved these pain au chocolat. Gabe's lucky enough to have some family from France and he had the opportunity to visit them for a summer and eat tons of real French bread and pains au chocolat. I never repeat that in person, by the way. I always say 'chocolate croissant' because, well: 1) I'm not French, 2) I don't live in France, 3) I don't speak French, and 4) I've never visited France. I took Spanish in high school. Thanks, Mrs. Gavilanes.

Another awesome thing blogging has forced me to do is branch out and cook things I probably wouldn't have tried to make without explicit instruction. Not because I was lazy (or maybe so, there will have to be a pretty good reason to ever spend my day making one of these again) but because I don't want to mess things up and throw away all that food. I'm cheap. And having a blog recipe w/ step-by-step instructions (something this blogger is famous for) takes some of the mystery and unknown out of the equation. Worse comes to worst, I can always ask somewhere out there in the blogging community and I'm sure I'll get some help.

Preheat oven 400 degrees. Best thing to do is get everything ready then take start working w/ the puff pastry. Get the chocolate cut up, sugar in a bowl, egg beaten w/ a splash of water. Have a baking sheet w/ parchment paper or silicone mat standing by too.

Then bust out the puff pastry - found in frozen foods section at the grocery store. Make sure the puff pastry is 'defrosted' overnight in the fridge. This isn't something you can cheat, you have to defrost overnight in the fridge. Flour work surface lightly and roll out to about 1/8".
Use the creases where the folds were and cut into 3 equal sections. Then cut each piece in half, then half again. Then brush each piece with egg wash.

Place chocolate on one end of the puff pastry. You can use your favorite chocolate. This batch is made w/ some Dark Midnight Espresso Theobroma chocolate my mother-in-law always gets us from her (and Gabe's) hometown of Sitka, AK. Love.

You can use chocolate chips if you want. Another variation is using fruit preserves. I've done fresh blueberries and sprinkled sugar on them too.


You may have to play w/ the position of the chocolate. You ideally want to end up with the seam side on the bottom.

Like this.

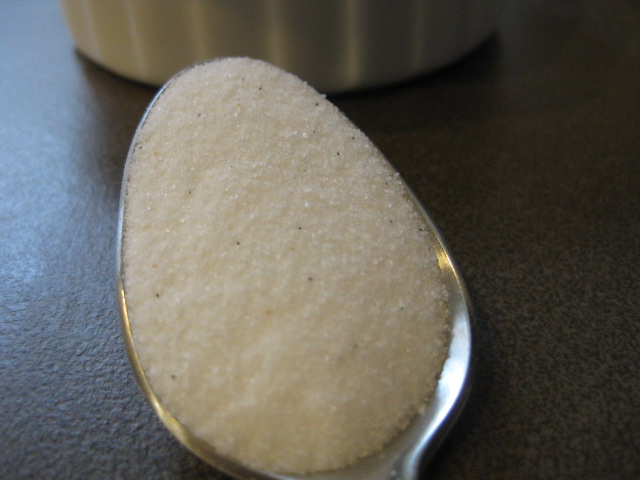
Brush w/ egg wash again and sprinkle w/ Sugar in the Raw (which, I didn't know is also know as turbinado sugar). Just any coarse sugar.

Aren't these little things cute? You can make both sheets if you're bringing someplace special.

Bakey bakey.
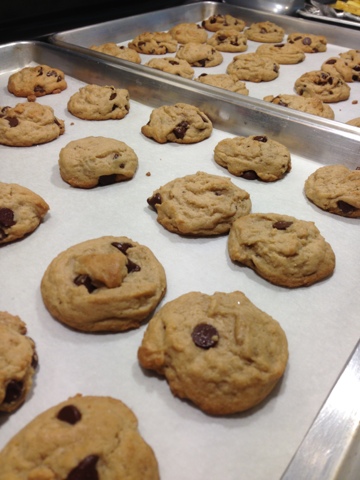
And 15 minutes later? These gorgeous little nuggets of joy (to quote Carrie).

So adorable. Enjoy!

Pain au Chocolat (Chocolate Croissants)

makes 12 mini croissants

Found on this post.

Make sure to thaw out the puff pastry overnight in the fridge.

1 sheet puff pastry
8 oz. dark chocolate
1 egg
2 tbsp. turbinado sugar (Sugar in the Raw)

Preheat oven 400 degrees. Get all ingredients ready. Beat egg with 1 tbsp water, have a pastry brush handy. Cut your chocolate into 2" by about 1/2" pieces. Oh, get the sugar in a bowl ready for sprinkling too. You want to work quickly with the puff pastry so it stays cold.

Unfold and roll out one sheet of pastry and sprinkle w/ flour. I rolled out a little thinner than how they come in the packaging - maybe a little thinner than 1/8"? Cut into 12 equal squares, they'll be a little rectangular. I just use the creases as guides. Cut there first, then cut each of the remaining 3 pcs in half, then half again. Brush with egg wash. Lay the chocolate on one end of the pastry and loosely roll. It's best if the seam ends up on the bottom. Place on baking sheet and brush with more egg wash. Sprinkle w/ sugar. Bake for 15 minutes or until golden brown.

Saturday, April 3, 2010

Chocolate & Vanilla Bean Crème Brûleé

Ever since I got these vanilla beans from Costco, I've been faced w/ a dilemma. How do I use up all these vanilla beans before they all dry out? Damn you, Costco.

Let's see..I have a dinner w/ friends tonight. How about some creme brulee? Everyone can have a turn at caramelizing their own sugar, love the interactive factor (and if they burn theirs to hell, they have to eat it themselves).

The only thing I added was the chocolate option for people like Gabe. Plus, there's that whole saying about variety being the spice of life?

Start w/ eight large eggs.
Separate egg yolks from whites.
Save the whites for omelets or something.
1/2 c. sugar. You can use vanilla sugar here too. I didn't think of making vanilla sugar until after I started. Duh.
Sorry the pictures aren't so good - it's always a struggle to take pictures when I have to use both hands while cooking.
So whisk the egg yolks to break them up.
Then add the sugar and blend until smooth.
Heat the cream in a saucepan until just before simmering.

Split the vanilla bean in half and using the back of the knife (thanks Ashley & thank your dad for me too! :D) gently scrape out the vanilla beans.

Blend into the egg mixture.
You can tell when the heavy cream is about to simmer by the little tiny bubbles on the side of the pan.
Temper the eggs by whisking in the hot heavy cream a little at a time. I used my 1/2 cup measure just so I wouldn't have to dirty anything extra. Gabe cried a tear of joy.
Whisk in. If you're using a hand mixer like me, just use the low setting. I had all these annoying bubbles. I was worried they were going to ruin my pretty creme brulees but you have to put the sugar on top anyways. No worries.

Ladle the vanilla ones into the ramekins. If you want to make chocolate ones too, hold back on dishing the rest of the mixture.
Get about 1 tbsp. of cocoa powder in a bowl.
Mix in 1 tbsp. very hot (I used boiling) water to melt the cocoa powder.
Mix until nice and glossy. Get all the lumps out!
Whisk the chocolate back into the remaining creme brulee mixture.

I got so annoyed w/ the foam I skimmed it off. All wasted energy.


Place the pan into the heated oven then pour the water in.
Easier to transfer stuff w/o spilling water.
40 to 45 minutes later, this is what you have.
Ooooh.
Yuuuuuum.
Chocolate tooooo.
I need a bib.
Then you get one of these. And if you don't have one, I wrote directions for how to do this w/ your oven in the recipe below.
Vanilla sugar. About 1 tsp.
Sprinkle on.
Torch until nice and golden.
Oy.
Take a big spoonful. For quality control purposes only.
And then try not to feel guilty about eating 10 more bites.
It's SO yum.
Check out the vanilla bean action.
Hard candy sugar coating. Enjoy!

Chocolate & Vanilla Bean Crème Brûleé

makes about five 1/2 c. servings
inspired by Kirkland's Best Rodelle Vanilla Bean packaging
8 large egg yolks
1/2 c. sugar
2 c. heavy cream
1 vanilla bean
2 tbsp. cocoa powder
1 to 1.5 tbsp. boiling water
5 tsp. vanilla sugar (or regular sugar)

Make sure your creme brulee dishes all fit in a pan with a rim so you can put water to about 1/2 way up the side of the dishes.

Preheat oven 325 degrees. Pour heavy cream into small saucepan and turn on medium low heat. Meanwhile, separate egg yolks from whites. Mix sugar into egg yolks until just smooth. When the cream is just about to simmer, remove from heat. Split a vanilla bean and gently scrape the seeds from the vanilla bean pod. Mix into the egg/sugar mixture. Temper the eggs with the hot heavy cream a 1/2 cup at a time. After about 1 1/2 cups of the heavy cream tempering the eggs, pour the egg mixture into the rest of the cream.

Dish up 2 or 3 of your vanilla creme brulees now. If you want the chocolate versions, in a separate bowl mix the cocoa powder and 1 to 1.5 tbsp. of hot water until the powder is smooth and glossy. Add back into the mixture and mix until combined. Continue to dish into ramekins.

Make sure you have at least 4 cups of hot water nearby. Place the ramekins in the pan/baking dish they will be baked in. Ladel the mixture into the ramekins. I had enough for about 5 1/2 cup servings. Place the pan in the oven then pour the water into the pan. This makes it a little easier to transfer the pan into the oven without spilling water overboard - or worse, INTO your creme brulee.

Bake for about 40 minutes. Allow to cool completely and refridgerate until about 30 minutes before you are ready to serve. Take them out of the fridge and let them come up to room temp. Spoon 1 tsp. vanilla sugar in each ramekin and either set under the broiler on the top rack of your oven (about 3 minutes, watch carefully) or use a small culinary torch to caramelize the sugar until a golden crust is formed. Serve immediately, enjoy!